

If you have ever used the Custom Tail Creator, you are familiar with how to upload your marker or colored pencil artwork to get your very own custom-made mermaid tail. Just print it out, color, snap a picture, and upload. Super simple!
But what if you want to color digitally?
Digital art opens the door for a lot more options. You can design your own scales, utilize stock photos for interesting textures, or paint with whatever color palette you could imagine. Not to mention that Ctrl+Z comes in quite handy.
This is a start-to-finish tutorial on how to digitally create a unique mermaid tail using the Custom-Design Mermaid Tail page at FinFun.com.
Let’s get started.
Downloading Your Template
- In a new tab, head to the Custom-Design Mermaid Tail page.
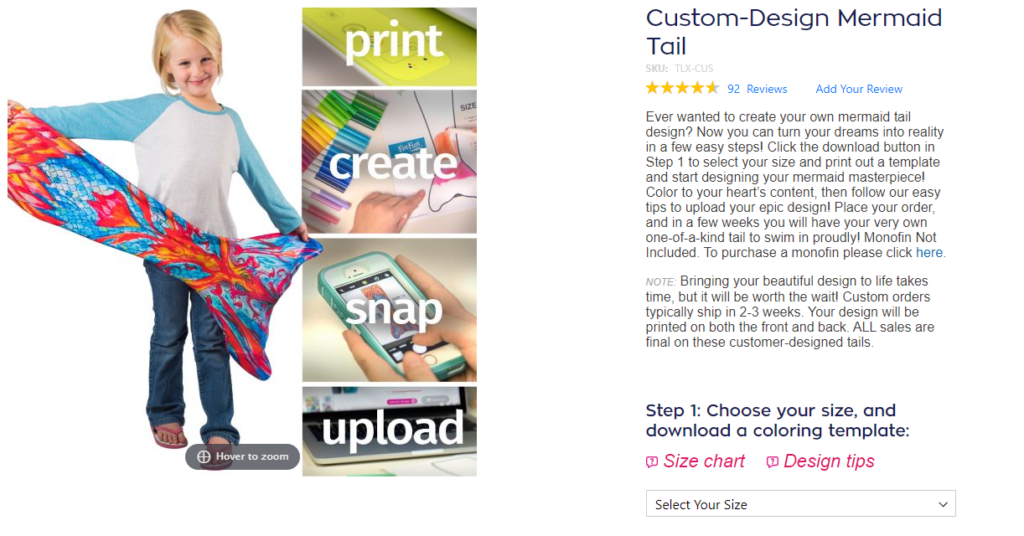
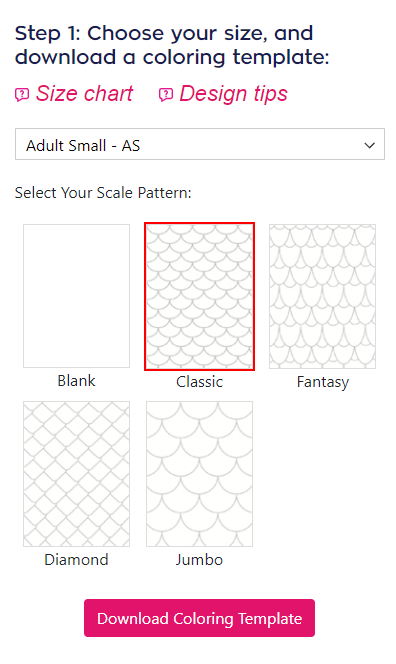
- Select your tail size and download a tail template. Choose from tail templates with scales or download the blank template if you want to start completely from scratch.
Tip 1: You can modify the .pdf in Adobe Illustrator. The vector information is preserved!
Prepping the Template for Artwork
After you download your tail template, open the file in your favorite image editing program (Photoshop, Gimp, Procreate, etc.). I’m most familiar with Photoshop, so I will use that.
Tip 2: If you don’t already have an image editing program, check out Gimp. It’s completely free!
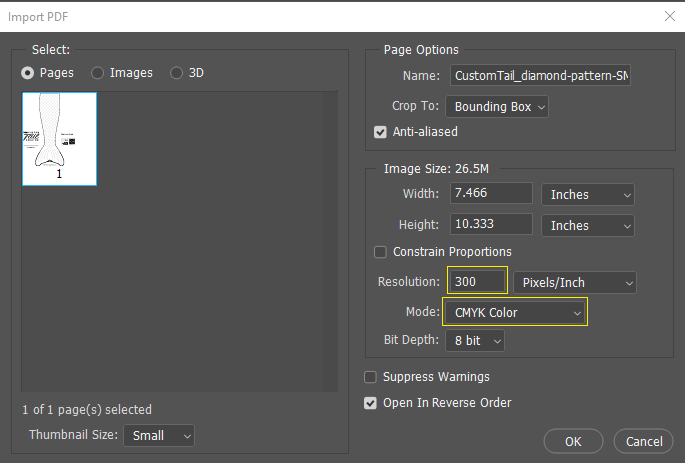
After you open the file in Photoshop, you will be prompted with a dialog box with size and color information.
- Make sure that the resolution is kept high. 300 ppi will work fine.
- Select CMYK for the Mode. The tail will be printed in CMYK and selecting this will ensure that the print will be as faithful to the original artwork as possible.
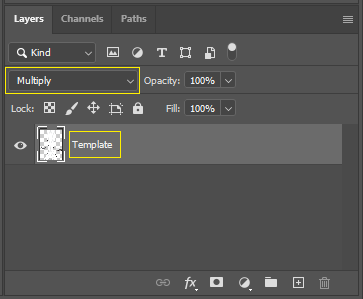
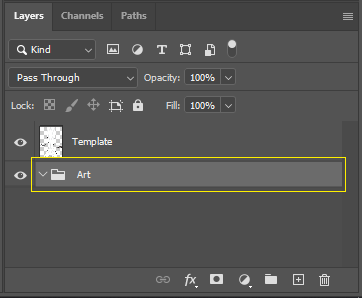
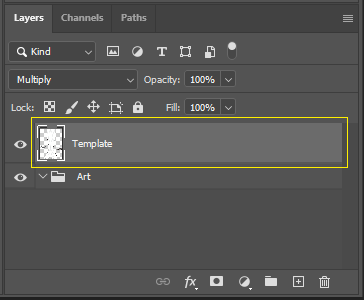
- Go to the layers window and rename “Layer 1” to “Template”. Now select Multiply from the drop-down list.
- Now let’s create a new group. We’ll call this group “Art” (yes, super creative I know). Drag that below the “Template” layer.
- Let’s go back to the “Template” layer. Select the Magic Wand tool and set the Tolerance to 50.
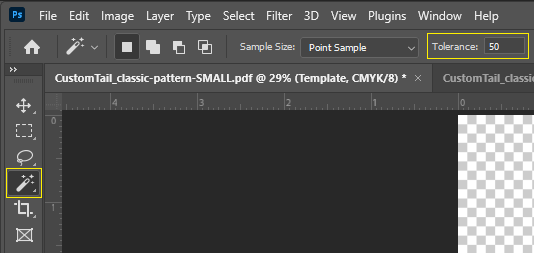
- With the Magic Wand tool selected, click anywhere on the white part of the tail template. You should see the “marching ants” outline your selection.

- With the selection still active, go back the “Art” group and click “Add layer mask” at the bottom of the Layers window. This applied the selection we made to anything within the “Art” group.
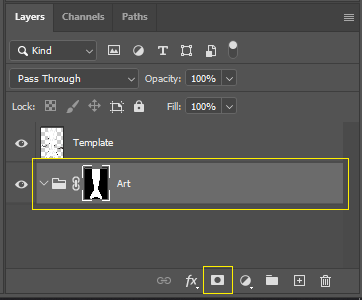
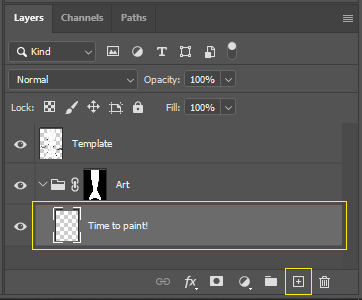
- Add a new layer within the “Art” group and name it something cool.
Painting
Now, it’s finally time for the fun part! It’s time to start painting!
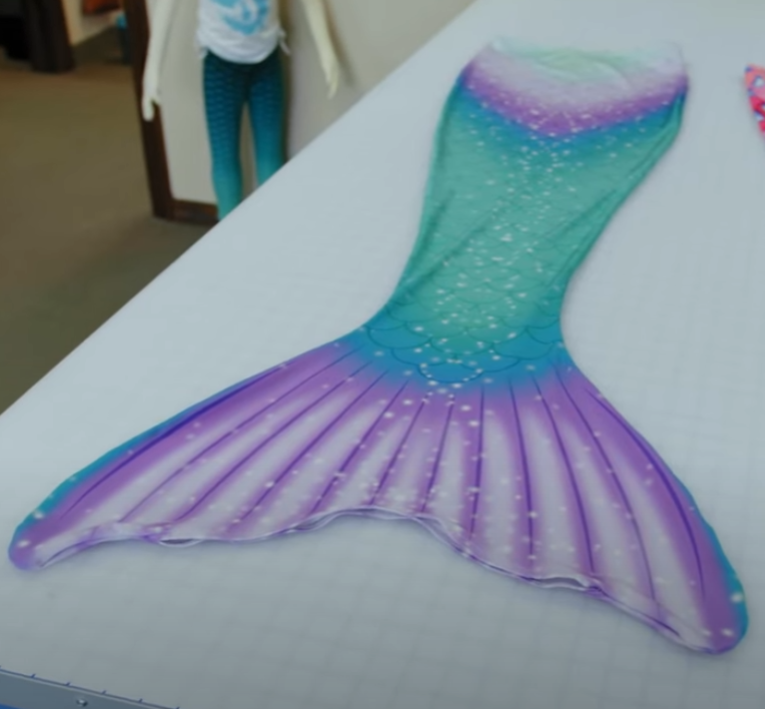
I like to find a color palette before I start painting. I found this cool teal and purple palette off of a Google image search.
Tip 3: Check out coolors.co for some other awesome palette options.

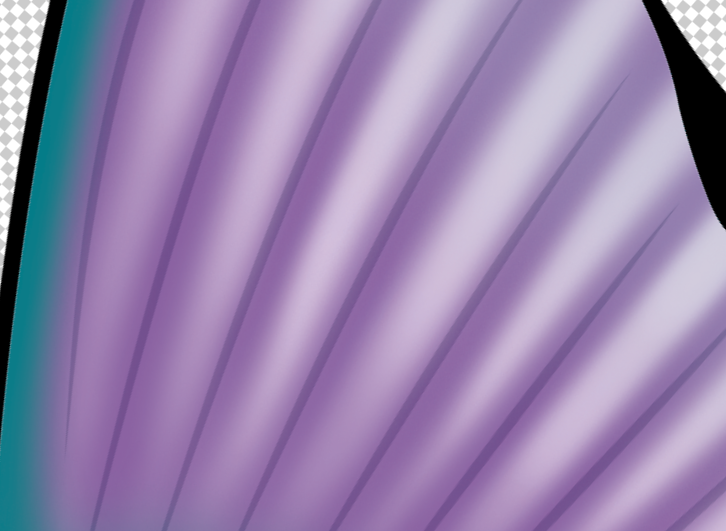
For this tail, I’m going to follow the 60/30/10 rule. 60% of the design will be my main color (medium teal), 30% will be my secondary color (light mint color), and 10% will be my accent color (dark purple).
Tip 4: About 1/2″ of the edges of the tail will be cut off when the tail is sewn up. Try to keep the important parts of your design away from that boundary.
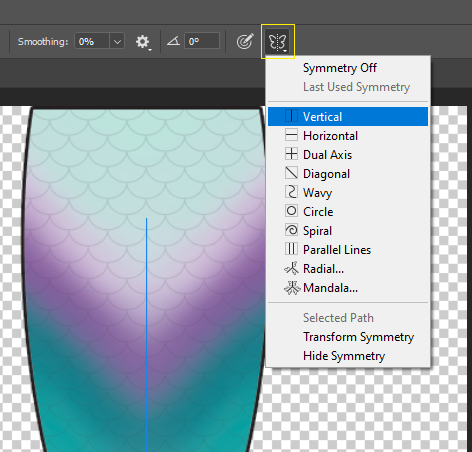
- Use the Symmetry tool in Photoshop and select “Vertical” for perfectly mirrored painting.
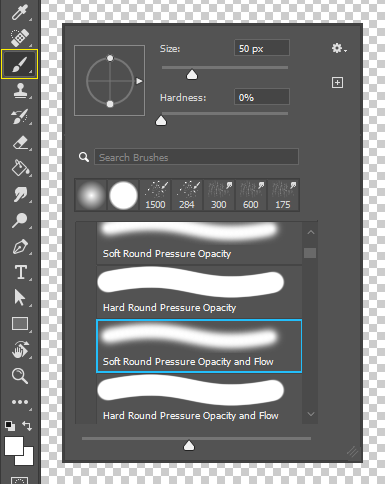
I like to use a Soft Round brush to paint. I keep the opacity at 100%, and my pen tablet allows me to vary the brush opacity to get smooth, blended colors.
Tip 5: If you only have a mouse, put the opacity of the brush at a lower value (10% – 50%). This will give you more blended colors.
Tip 6: Tap “R” to rotate your canvas in Photoshop. This helps view your tail from any angle as well as making those little fluke lines a bit easier to paint.
Custom Sparkle Brush
This part is completely optional, but I like to use a custom sparkle brush to add texture. It’s super easy to make but adds so much visual interest to the artwork!
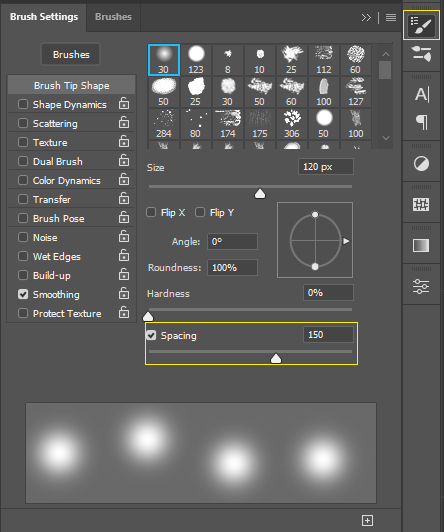
- First, with a soft round brush selected, go to the Brush Settings window.
- Go to Spacing and set the value to 150.
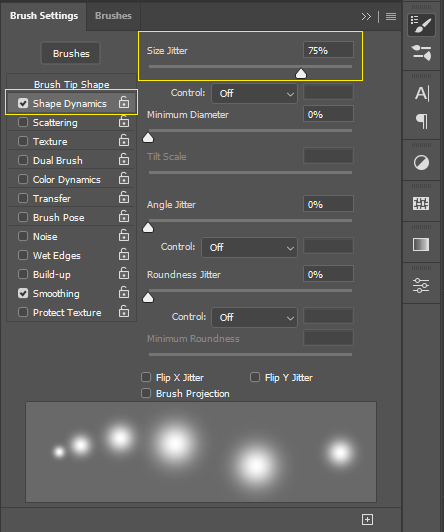
- Next, go to the Shape Dynamics option and set the Size Jitter to 75%
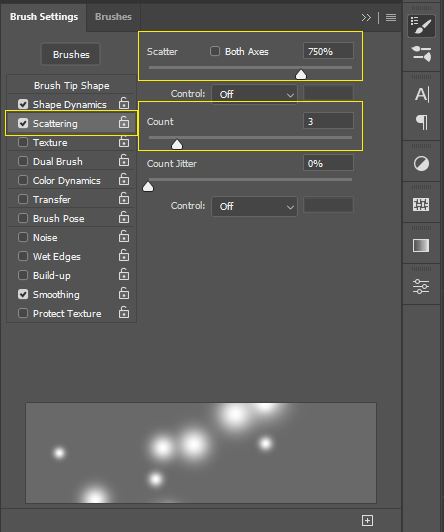
- Lastly, let’s go to the Scattering option and set the Scatter to 750% and the Count to 3.
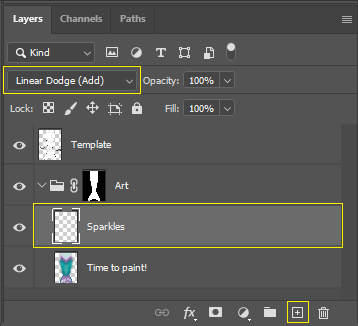
- I like to add the sparkle texture in a new layer that’s set to Linear Dodge to get maximum contrast.
That’s it! Try it out. Your new Sparkle brush should already be selected and ready for painting. Before you start painting, make sure you have a lighter color selected (I used white).
You may want to size down your brush size depending on how large you want the sparkles to be. Also, try putting the brush and different opacities. You can also try different layer blending modes such as Overlay to give a different effect!
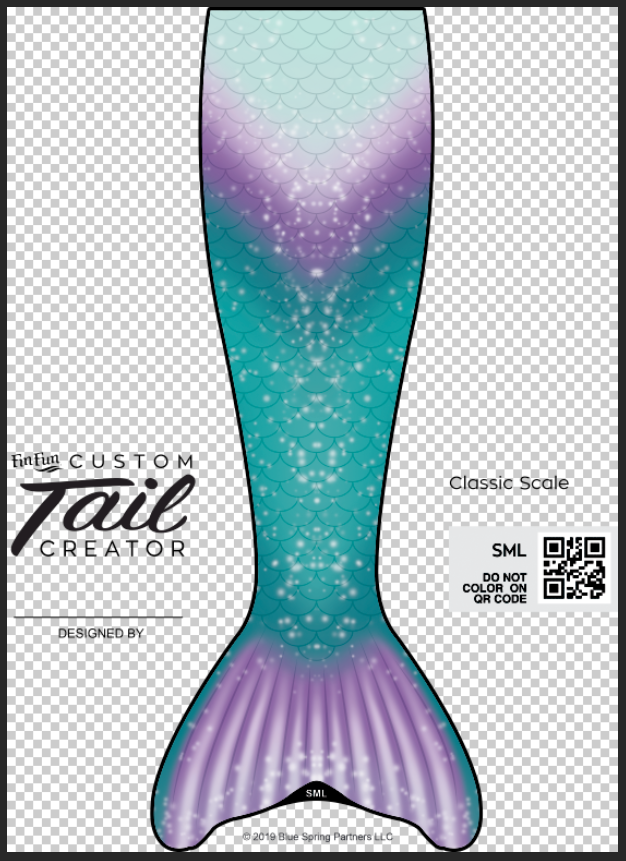
And we’re done!
This is obviously a pretty simple version of a mermaid tail that you can make. The options are only limited by your own imagination, so get creative!
Exporting Your Artwork
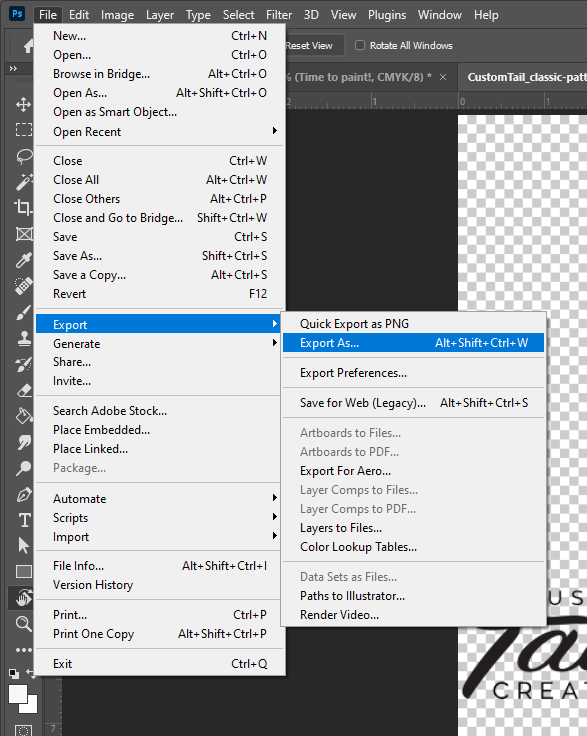
Go to File > Export > Export As…
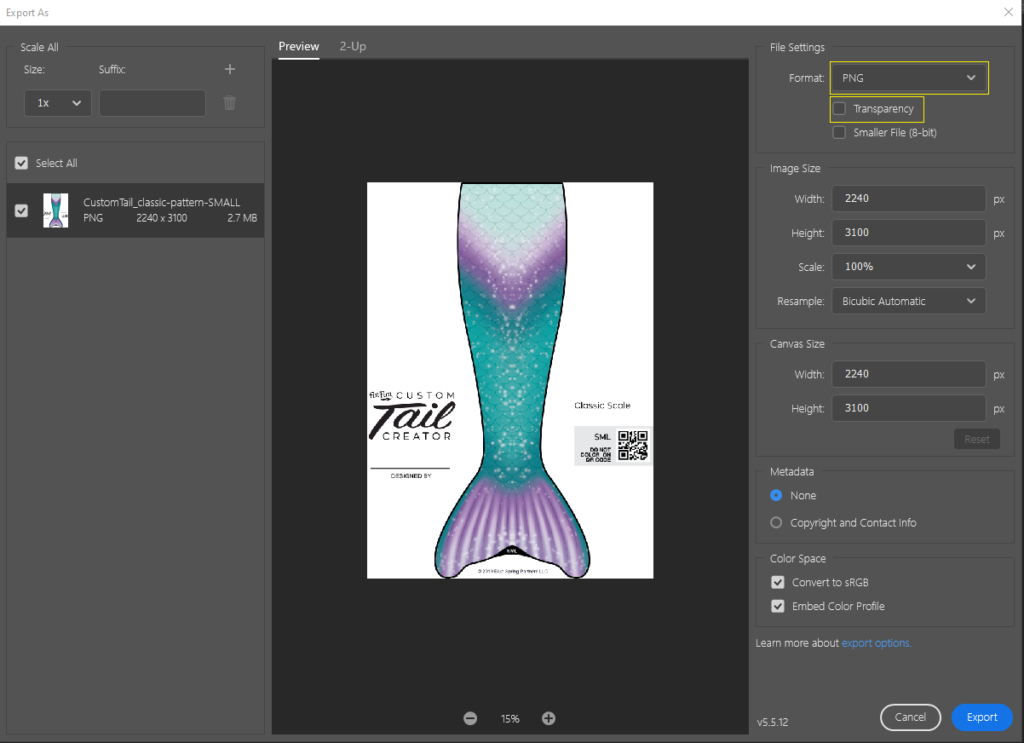
- For Format, you can select .jpg or .png. If you select .png, make sure that the box for Transparency is unchecked.
- Now all that is left is to name your file and upload it on the Custom-Design Mermaid Tail site
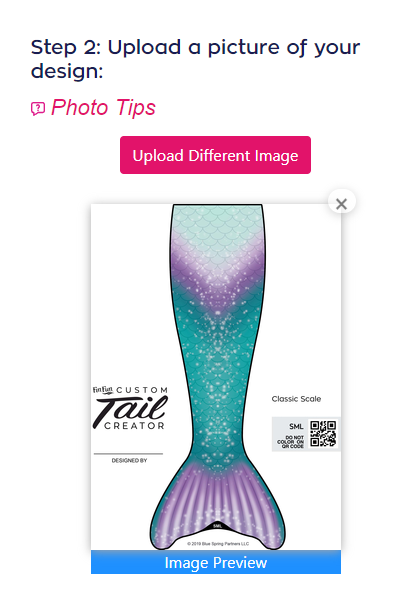
And voila! Your very own digitally designed mermaid tail!
Check out the Custom Tail Creator and create your digital mermaid masterpiece today!
I love both my BARRACUDA and my AQUAMARINE tails. And coming from a triton. Yes!
What platform are you using?
We used Photoshop 😊