

Fin Fun Mermaid tails are my go-to for mermaid swimming and fun! They are easy to use and last a long time.
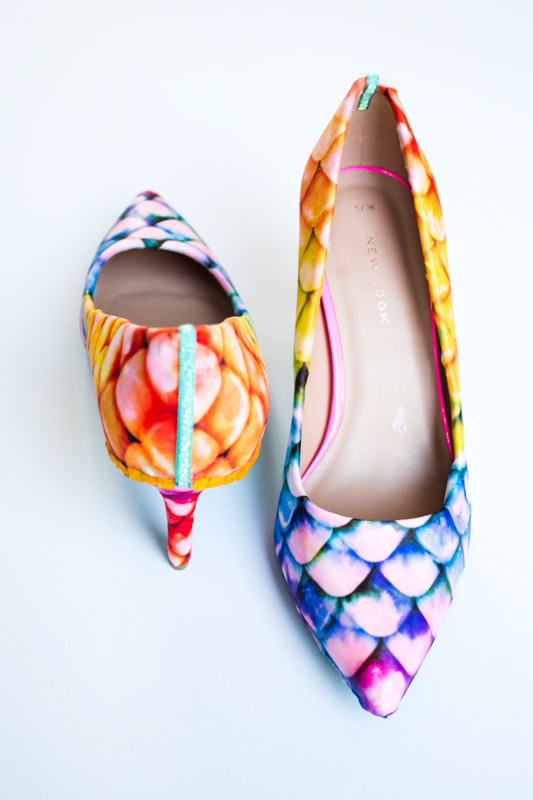
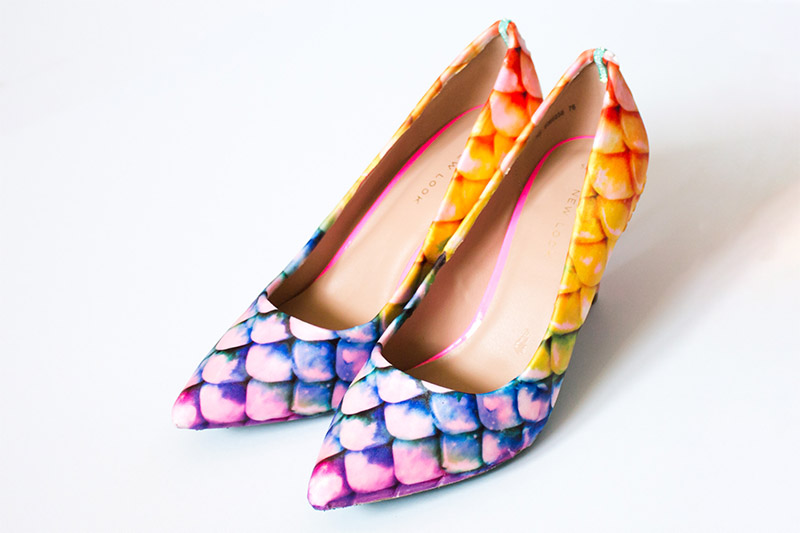
I’m always devastated when my tails start to show wear, but I’ve found some ways to reuse and upcycle my tails. I’ve previously used the fabric to make headbands and a beach blanket, but my latest creation just might be my favorite—mermaid shoes!
To make these shoes, I followed a tutorial I found on the blog, LoveMaegan. I recommend reading through these instructions before attempting this yourself as some of the parts are pretty tricky!
*Please note that children may need adult supervision when trying this DIY project.
Tips:
- Work slowly and carefully – I found it so much more difficult when I rushed parts of the shoes.
- Let each part dry before moving on.
- Use superglue sparingly. It makes the fabric unworkable and it buckles the fabric once dry. It also turned my gems from being sparkly to a dull white-ish yellow. I would have much preferred to use some metal studs here.
- If you are covering the soles in nail polish, do that before covering the shoes.
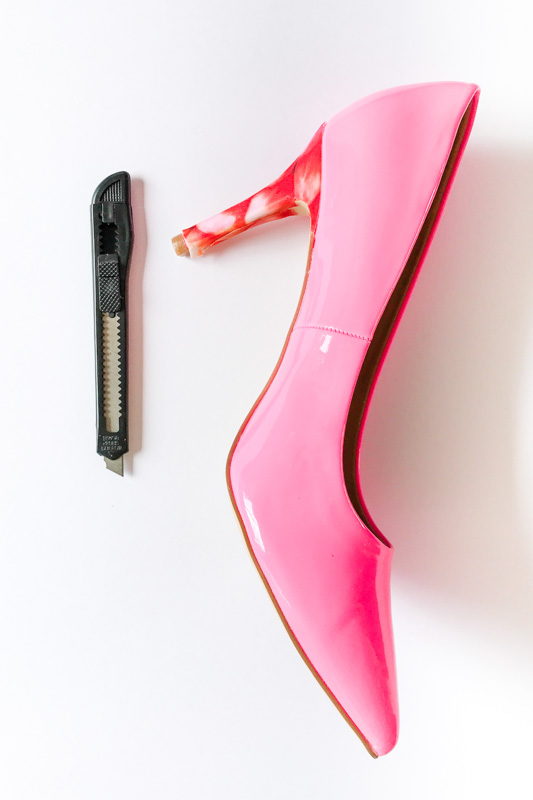
- Use a more neutral shoe underneath – my hot pink actually works quite well, but I think that was luck rather than anything else! You can see the color through the fabric!
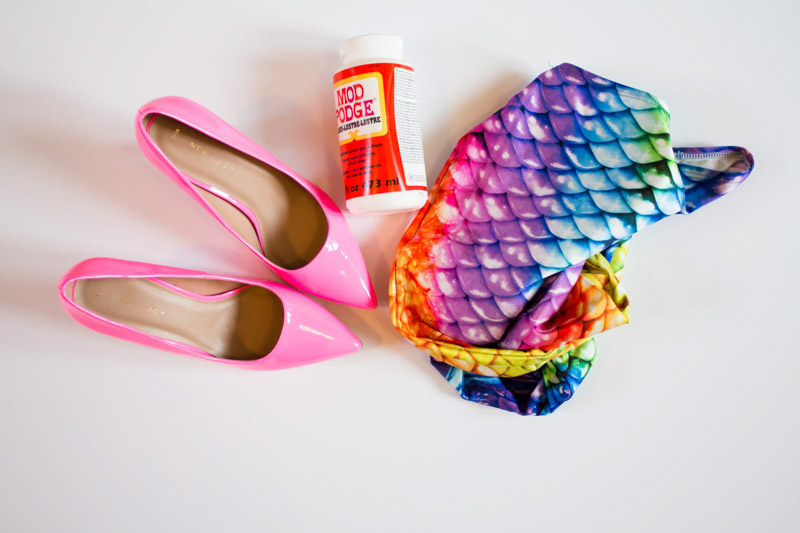
Supplies you will need:
- 1 Pair of shoes – I suggest using a worn pair of heels or buy some from a thrift store
- Sandpaper
- Mod podge – (I used gloss)
- Fabric Glue or superglue – I used Gorilla Glue
- Ribbon
- Scissors
- X-Acto or Stanley Knife
- Old Fin Fun Mermaid Tail/Fabric
- Rhinestones or metal studs
- Nail polish (optional)
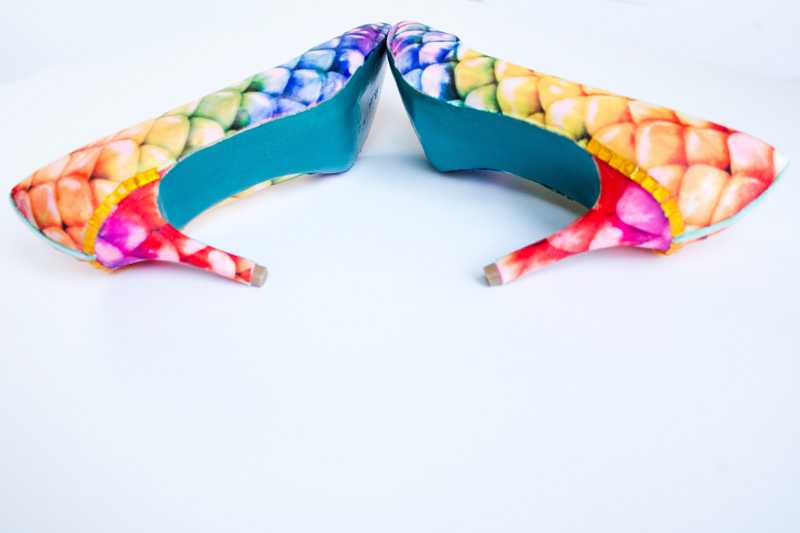
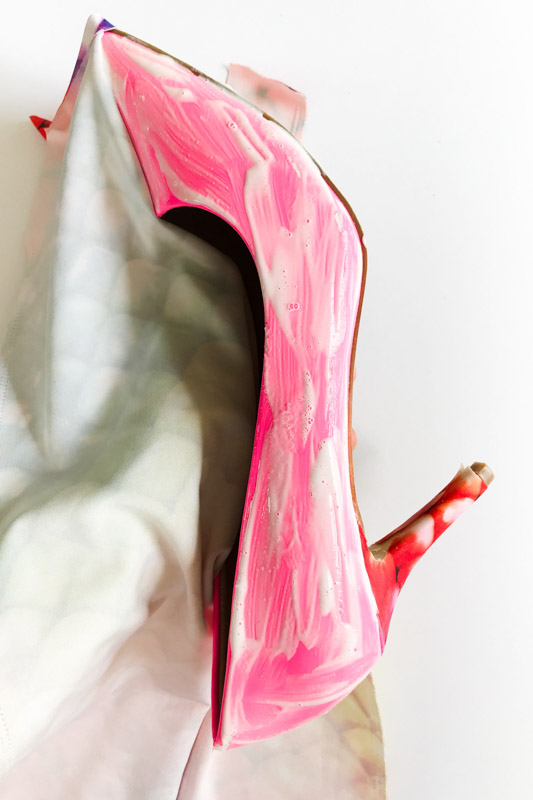
1. Soles of the shoes
If you are decorating or coloring the soles of your mermaid shoes, I recommend doing this before covering the shoe. (However, I didn’t and it still worked).
I used a solid color of nail polish and then topped it with a sparkle finish.
Despite being worried the nail polish would make the shoes slippery, it wasn’t an issue, and a quick walk from the car park to my meeting roughed them up enough to be fine!
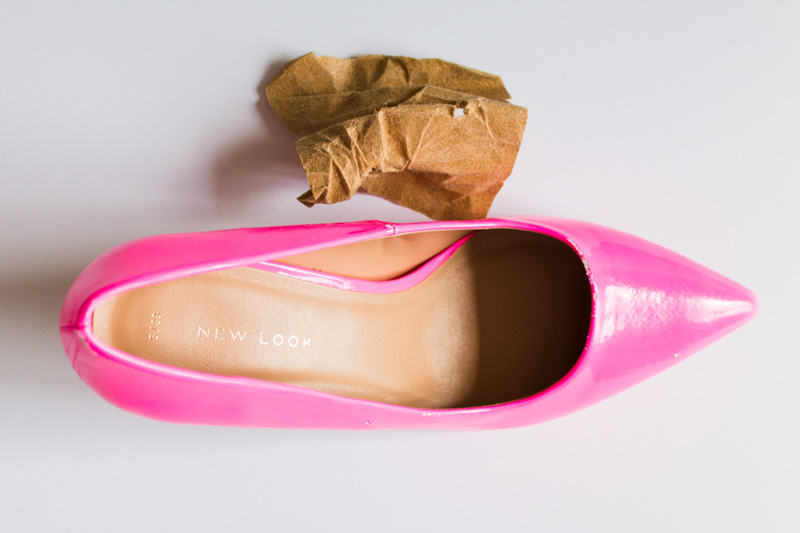
2. Prep your shoes and fabric
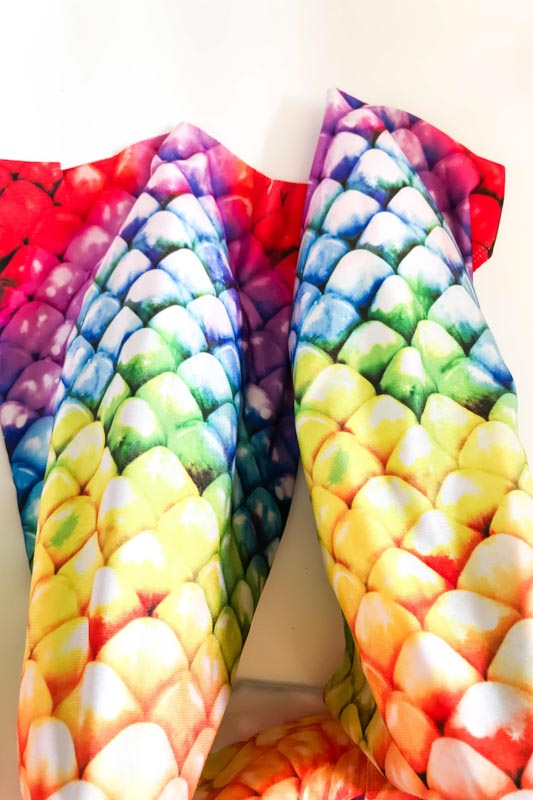
Cut your mermaid tail into the two halves (cut the tail at the seam). Work out which part will fit best on the shoes.
Sand your shoes to give them a rough surface. This will help the glue to stick onto the shoes.
3. Covering the heels
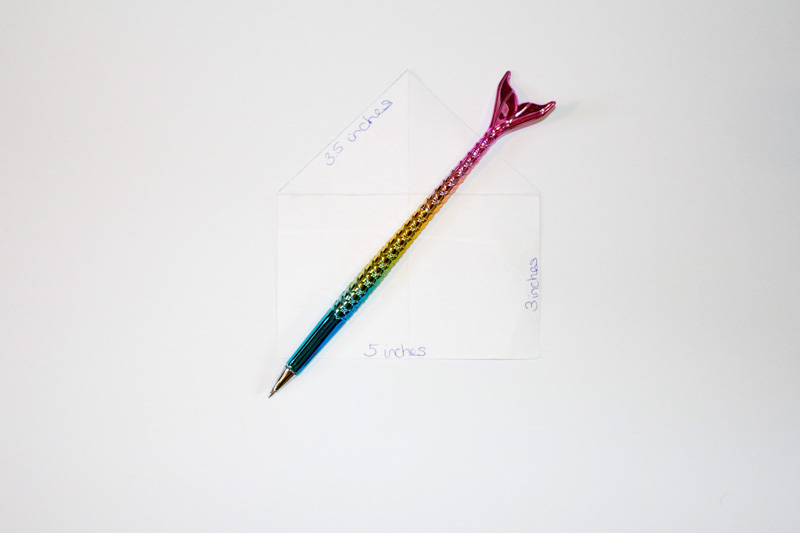
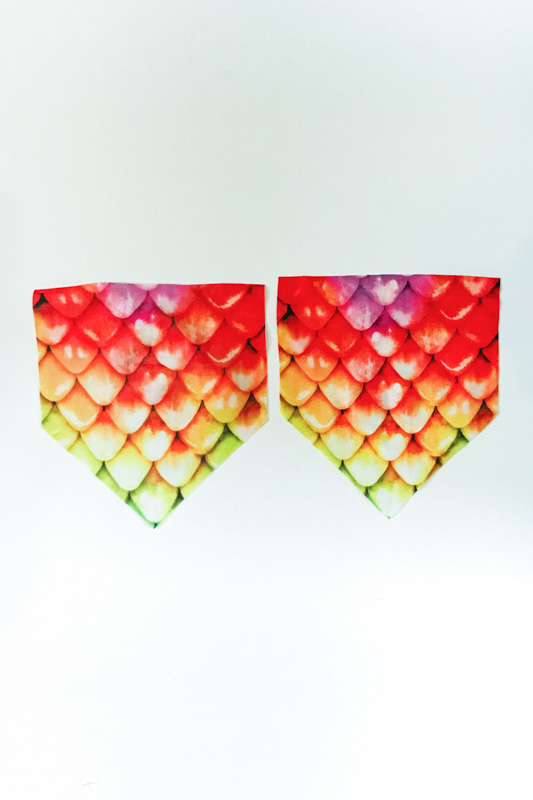
Cut fabric for the heel. If you want your mermaid shoes to match, make sure you use one side of the mermaid tail for one shoe and the other for the other shoe. I used the blog from Love Maegan to help me – but you want to cut a pentagon of fabric for the heel. I used a 5 inch x 3 inch rectangle with a triangle on the top which is 3.5 inch sides and a 5 inch base.
Using a pentagon template, cut the fabric to cover the heel. Make sure the scales go the right way!
Cover the heel in mod podge, place the pentagon over the heel and smooth down.
This isn’t the easiest – the glue will make the fabric slippery, so take your time.
Let dry and then trim the excess fabric carefully with an X-Acto knife. There was a clear ‘seam’ in my shoe between the pink part of the shoe and the sole. I slid the knife in this seam and trimmed the fabric easily this way.
4. Covering your shoe with fabric
Determine where you want your scales to fit over the shoe. Drape over (don’t add glue yet!). Leave at least an inch around the shoes.
Cover the shoes in mermaid fabric.
Glue the tip down on one shoe. Smooth down, then work on the sides.
DO NOT glue the back yet—work on smoothing out and gluing the sides.
Let dry, then trim off the excess in the middle. Leave around ¼ inch to fold over into the shoe. Repeat with the other shoe.
Trim the fabric in the middle of the shoe.


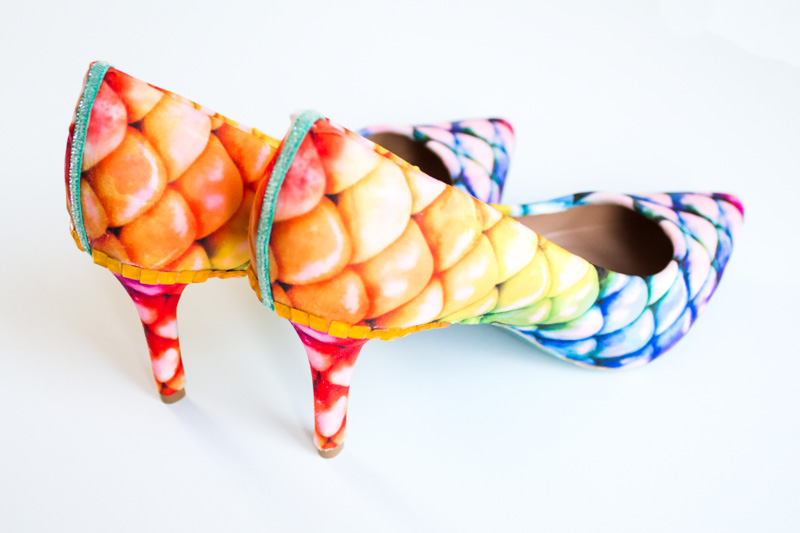
5. The back of the shoe
This part is tricky—work on the back of the shoe slowly and carefully.
Leave around ½ inch to overlap. I actually placed one side down, over the midline and then folded the other side to the halfway point. We will cover this seam later.
On the back/heel, fold one side just past the halfway point, then the other side to the halfway point.
6. Make it look pretty
Fold down the fabric inside the shoe, using mod podge, fabric glue, or superglue where needed.
(Be aware that superglue will harden the fabric significantly. Therefore, on the inside of the shoe, make sure it won’t rub on your feet; gently stretch the fabric over the shoe, and seal with a dot of superglue if needed).
You will need to make little cuts into the fabric (which then can be overlapped when stuck down) to adjust for corners and curves.
Do the same for underneath the shoe.
When you get to the toe, cut into one edge and overlap, stick down underneath (see the video).
Where the shoe meets the heel, trim with a knife. For my shoe, there was a clear seam that I could trim along (be careful!).
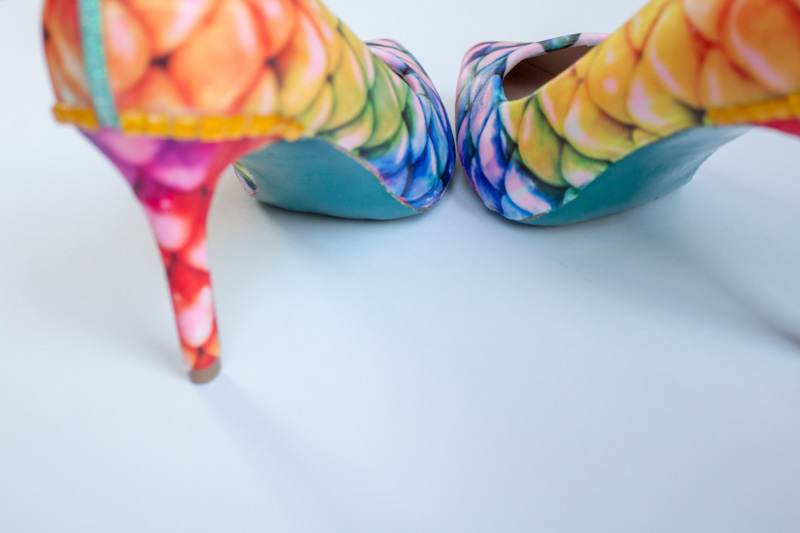
7. The finishing touches
Place a ribbon along the seam on the back of the shoe and glue it down (Use superglue or fabric glue here)
Add decorations to cover the seam where the heel meets the shoe — I added yellow studs (see the photo above this photo)
It’s your turn to make mermaid shoes!
This project was honestly so fun! If you don’t have mermaid tail fabric, that’s okay! Be creative and make sure to reflect your personality! Use the hashtag #FinFunDIY to share what you create!
About the author: Anna Haskell is a Mermaid U affiliate with Fin Fun and is the owner of South Coast Mermaids located in West Sussex, England. You can learn more about Anna and her mermaiding business and read her blog at southcoastmermaids.com.