

There are several reasons why everyone should paint mermaid rocks.
They make great decorations, inspire creativity, and initiate interaction within your community. Have you ever hid painted rocks around town? It’s fun to see who finds your rock and where they hide it next!
If you want to feel like a mermaid without traveling, painting mermaid rocks will help bring the beach to your home.
Supplies needed
Mermaid rocks are easy to create, and you don’t need many supplies.
Of course, you’ll need rocks to paint on. You can buy some at the store, but you can also pick up a few rocks by taking a stroll outside. The best rocks to use have at least one smooth side to paint on.
Once you’ve selected your rocks, make sure you have the following items:
- Acrylic paint
- Paintbrushes of various sizes
- Paint pens (optional)
- Sharpie pens (optional)
- Matte or glossy sealant (or Mod Podge)
Before you start painting, scrub your rocks so they don’t have dirt hiding in the crevices. A toothbrush works well getting into all the little grooves. Then, let them air dry completely.
You can cover the entire rock in a base coat of paint if you want, but you can also paint a mermaid masterpiece on the bare rock. You’re the artist here, so you get to decide how to paint mermaid rocks. We’re here to offer a bit of inspiration as you bring the sea into your home.
Mermaid scales
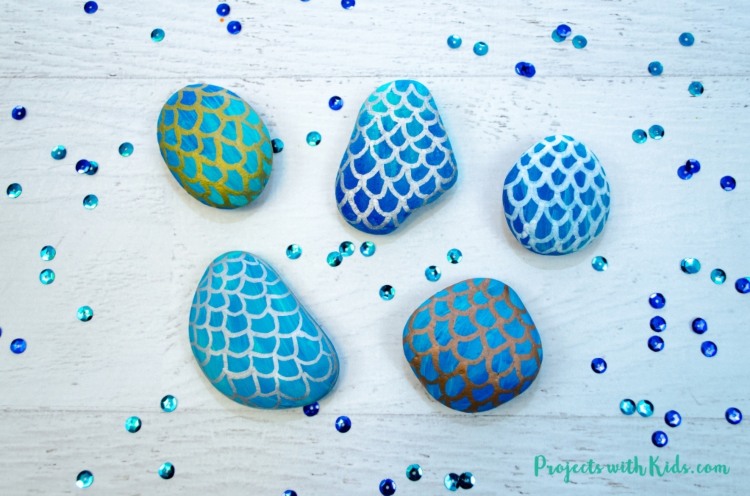
As demonstrated by Projects with Kids, mermaid scales are one of the easiest ways to paint rocks.
To start, cover the rock in a wash of color. You can choose one color or blend a variety together to look like your favorite Fin Fun mermaid tail.
Once the paint is dry, it’s time to add the individual scales. You can use a small paintbrush, paint pen, or Sharpie marker for this step.
Once you create a row of scales, make sure you start the next row in the middle of the scale above it. This creates a natural scale pattern that’s both accurate and aesthetically pleasing!
Add sealant or Mod Podge once dry to protect your work of art.
Beach scenery
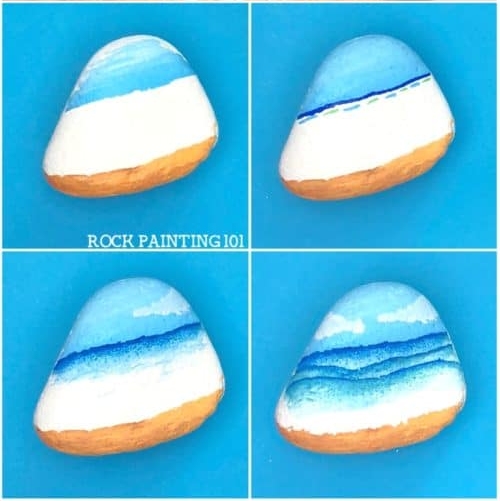
If you’d rather add to your beach decor, try painting this beach landscape from Rock Painting 101.
Start with a white base and add a dark blue line to mark your horizon. Next, blend the blue from the horizon into the white base. Add a little green to the mix to really capture that beachy hue.
Keep in mind that the paint colors will only blend if it’s still wet.
Add more dark blue lines and repeat the same steps to create layers of waves. Paint the sand on the shore and the blue sky while you wait for each layer to dry. Once you finish the layers, dab more white between the waves and the sand to create sea foam.
You can leave your beach landscape as is and seal it, or you can add some of your own unique details like birds in the sky, shells on the beach, or dolphins breaching the water’s surface.
Dot by dot
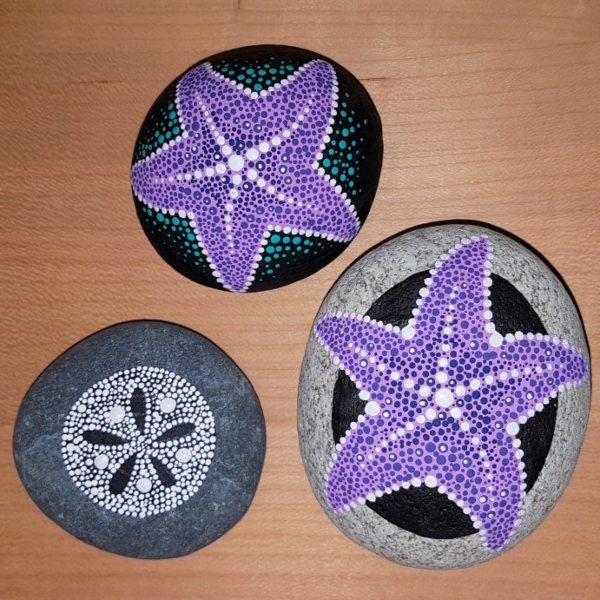
If you like mandalas, try dot painting starfish and sand dollars like Living a Creative World.
Start by painting the base shape of the starfish with a paintbrush and fill it in. Next, dip the other end of the paintbrush in the paint to create each paint dot. Use one color of dots to outline the shape and inner star, and other colors to fill in the rest.
To keep the dots from looking plain and mundane, play with different sizes of dots as you go.
The process of dot painting a sand dollar on a rock is very similar. Start by painting and filling in a circle, and outline the edges and inner star with dots. Then, fill in the rest with dots of various sizes.
Once the paint dries, seal it and enjoy your work of art!
Mermaid portrait
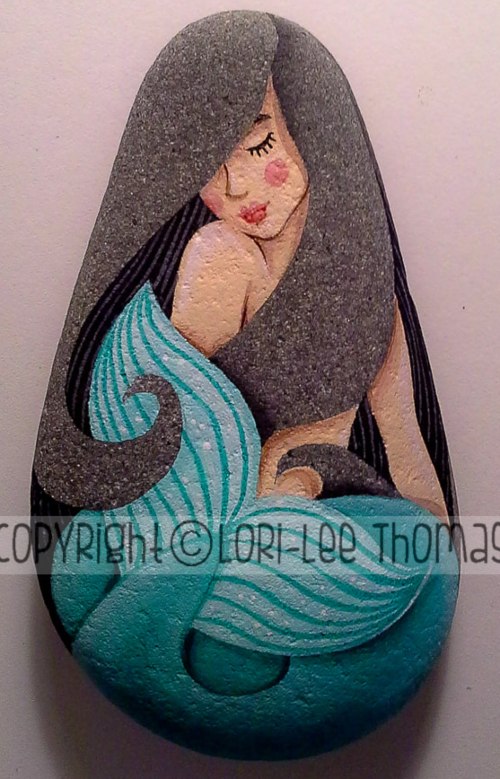
If you want to stretch yourself as an artist, paint a mermaid portrait. You can use your previous mermaid drawing skills to help you!
Lori-Lee Thomas Art has several examples to use for inspiration, as well as several other beach and animal-themed painted rocks!
In several of her mermaid paintings, she leaves the natural color of the rock for the mermaid’s hair and paints the rest. Each example features different poses to try too.
To personalize the mermaid, you can paint it to look like yourself or someone in your pod in their favorite swimmable mermaid tail! Seal the paint when it dries, and wait for the sealant to dry before handling it.
You can then keep it for yourself or give it away and surprise your friend!
Be Creative When You Paint Mermaid Rocks
The best part about painting is letting your creativity take over. While there are plenty of examples to use for inspiration, make each rock painting your own. You might come up with something you like more than the original!
Which style of mermaid rock painting are you going to try? Let us know in the comments!
Looking for a Fin Fun Mermaid promo code? Take a look!
Such great ideas for painting rocks — will try these out!
Let us know how it goes! We’d love to see your artwork! 🙂